
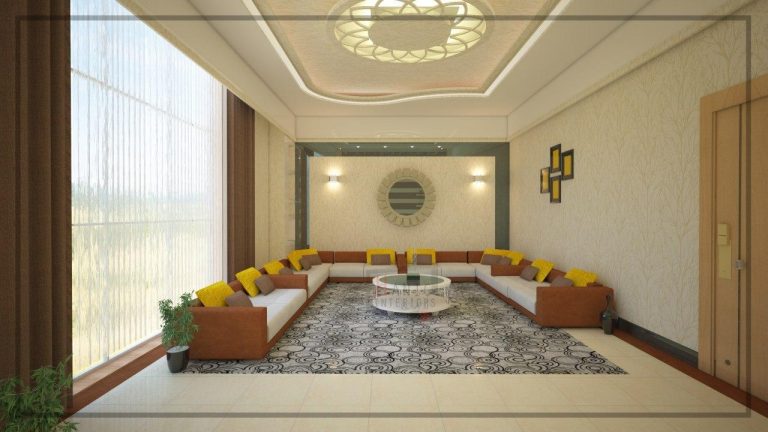
Why most interiors fail at night
Almost every room that disappoints its owner disappoints them after sunset. In daylight the architecture does the work: light arrives from a large, high source, falls across surfaces at a shallow angle, and reveals texture. At night, one pendant in the middle of the ceiling replaces all of that with a single harsh point, and the room that photographed beautifully at 15:00 becomes a cave with a hotspot in the middle.
Lighting is not a layer you add at the end. It is the second design after the plan, because it determines where the switches, the ceiling voids, the conduits and the joinery power supplies have to be — all of which are set in concrete, sometimes literally, long before anyone chooses a lamp.
This article covers the four layers of light, the numbers you need to specify them, and the format of a lighting schedule a contractor can actually build from.
The four layers
Every properly lit room contains four kinds of light. Most badly lit rooms contain one.
1. Ambient
The general wash that lets you move safely and read the shape of the room. It should be soft, indirect where possible, and never the only layer on. Cove lighting, wall washers, uplights and large diffuse pendants all qualify. A single downlight in the centre of the ceiling does not — it is a point source pretending to be ambient.
2. Task
Light aimed at a specific activity: the worktop, the desk, the reading chair, the mirror. Task light is defined by where it lands, not by the fitting. The test is simple — does your own body cast a shadow onto the thing you are trying to see? If yes, the task light is in the wrong place.
3. Accent
Directional light at roughly three to five times the ambient level, aimed at art, texture, planting, a stone wall or a sculptural object. Accent light is what makes an interior look designed rather than merely illuminated. It is also the layer most often cut from the budget and most often regretted.
4. Decorative
The fittings you see: the pendant over the table, the table lamps, the wall sconces. They contribute surprisingly little useful light and an enormous amount of character. Think of them as furniture that glows. Choose them last, and never rely on them to do the job of layers one to three.
The minimum viable scheme
Any habitable room should have at least three separately switched sources from at least two different layers, all dimmable. If your electrician has given you one switch and one circuit, the room is not finished.
The numbers you need to specify
Designers talk in feelings; contractors build from numbers. These are the ones that matter.
| Quantity | What it means | Typical interior values |
|---|---|---|
| Lumen (lm) | Total light emitted by the lamp | 400–800 lm per domestic downlight |
| Lux (lx) | Light landing on a surface | Living 100–200, kitchen worktop 300–500, study 500, bathroom mirror 300 |
| Colour temperature (K) | Warm to cool appearance | 2700 K living/bedroom, 3000 K kitchen/bath, 3500–4000 K workshop only |
| CRI / Ra | Colour rendering accuracy | Ra 90+ everywhere people or materials are seen; Ra 97 for art |
| Beam angle | Spread of a directional source | 10–24° accent, 36–60° general, 60°+ wash |
| UGR | Glare rating | Below 19 for work areas; use deep-recessed or baffled fittings |
Two practical rules. Keep colour temperature constant within a sightline — mixing 2700 K and 4000 K in one visual field looks broken, and no amount of dimming fixes it. And specify CRI explicitly; cheap fittings default to Ra 80, which makes skin look grey and turns every warm timber dull.
Placement rules that survive site conditions
Downlights
Never in a grid. A grid lights the floor evenly and the room badly. Place downlights where they have a job: 60–90 cm out from the wall to wash it, over the front edge of a worktop, framing a doorway. In a 4 × 5 m living room, six well-placed downlights beat twelve in rows.
Worktops
Light must come from in front of the person, not from behind. Downlights centred over the worktop put the light behind you and your own shadow onto the chopping board. Move them 15–20 cm forward of centre, or better, use an under-cabinet strip with a diffuser at the front edge of the upper unit.
Mirrors
Vertical light at both sides of the face, at roughly eye level, is the only arrangement that renders a face without shadows under the eyes and chin. A single fitting above the mirror is the standard solution and the worst one. If you must light from above, add a diffused strip behind the mirror to bounce light back onto the face.
Art and texture
Aim accent light at 30° from vertical. Steeper and you get reflections in glazed art; shallower and the frame casts a shadow across the canvas. For a textured wall, deliberately graze it at 10–15° from the surface — the shallow angle is what reveals the texture.
Stairs and thresholds
Light the treads, not the eyes. Low-level linear lighting in the string or in the wall below handrail height gives you safe stairs with no glare, and it looks far better on a night-time approach than a bright fitting overhead.
Control: circuits, dimming and scenes
A beautiful lighting design ruined by bad switching is the most common failure we see on site. Decide the circuits at the same time as the fittings, and give the electrician a switching schedule, not a verbal instruction.
- Group by layer, not by geography. All the wall washing on one circuit, the downlights on another, the decorative fittings on a third. Grouping “left half of the room” and “right half” gives you no control over mood at all.
- Dim everything. A dimmable driver costs slightly more and doubles the usefulness of the room. Confirm that the dimmer type matches the driver — trailing edge for most LED drivers — or you will get flicker and buzz.
- Four scenes is enough for a domestic room: Bright (cleaning, guests arriving), Evening (the default), Dining, and Night (very low, for moving through the room). More than four and nobody remembers them.
- Switch at the door you actually use. Walk the room with the plan and mark the position of every switch from the direction of arrival. Two-way switching on any room with two entrances is not a luxury.
The lighting schedule a contractor can build from
The deliverable is not a mood image. It is a drawing plus a table. The reflected ceiling plan shows position and orientation; the schedule carries everything else. Ours always contains these columns:
| Column | Example |
|---|---|
| Type reference | L-03 |
| Location | Living room — wall wash, north wall |
| Quantity | 4 |
| Fitting | Recessed adjustable downlight, 68 mm cut-out |
| Lamp / module | 9 W LED, 650 lm |
| Colour temp / CRI | 2700 K / Ra 92 |
| Beam angle | 36° |
| Finish | Matt black baffle, white trim |
| Control circuit | C2 — dimmable, trailing edge |
| Mounting note | 900 mm from wall face, aimed at 30° |
Add a ceiling void depth note for every recessed type. More lighting schemes are ruined by a 55 mm fitting in a 40 mm void than by any aesthetic mistake — and it is always discovered on site, after the gypsum is up.
Commissioning: the two hours that make the difference
Every adjustable fitting on site is installed pointing straight down, because that is how it comes out of the box. Aiming them is a separate task, done at night, by the designer, with the client present. Two hours of commissioning improves a scheme more than doubling its budget.
- Turn everything on at full, then off. Work one circuit at a time from darkness.
- Aim accent fittings first; they set the character of the room.
- Set the dimmer maximum for each circuit — most schemes are commissioned far too bright and the client turns everything down to 40 per cent forever.
- Record the scene settings in the handover file, along with the lamp references, so a replacement in three years matches.
- Walk the approach: front door, hall, living room, at night. Fix anything that glares on the way in.
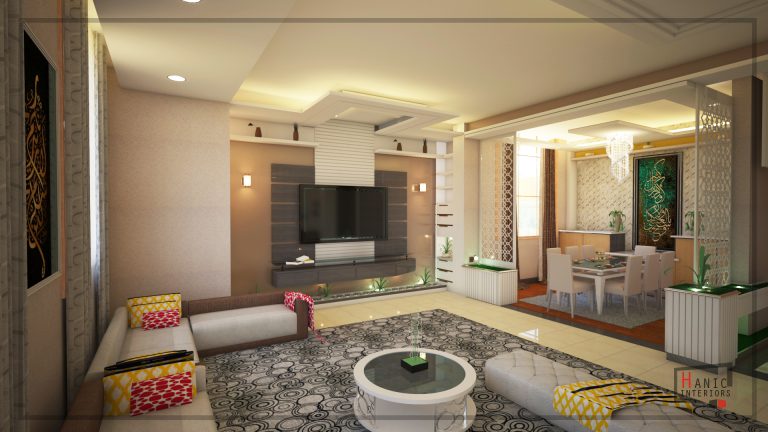
The lighting checklist
- At least three sources per room, from two or more layers
- Every circuit dimmable, dimmer type matched to driver
- One colour temperature per sightline; CRI 90+ specified in writing
- No downlight grids; every fitting has a stated job
- Task light in front of the user, never behind
- Mirror lit from the sides at eye level
- Accent aimed at 30°, grazing light at 10–15° for texture
- Ceiling void depth confirmed against every recessed fitting
- Switching schedule issued with the drawing, two-way where needed
- Night-time commissioning booked before handover
Lighting is the cheapest part of an interior to specify well and the most expensive to fix afterwards. Our interior design service includes reflected ceiling plans, a full lighting schedule and on-site commissioning as standard.
Written by the studio
Mesganaw Abateneh is part of the Hanic Interiors design team in Addis Ababa. If this article raised a question about your own project, write to us — we answer every message within one working day.